
Andersen 400 Series Window Installation Instructions: A Comprehensive Plan
Andersen 400 Series window installation requires precision. Resources like YouTube tutorials and Andersen’s parts website offer guidance.
Understanding the operator mechanism, especially for casement windows, is crucial for smooth functionality and long-term performance.
Andersen 400 Series windows represent a popular choice for homeowners seeking a balance of performance, aesthetics, and value. These windows are constructed with a durable fiberglass exterior and a wood interior, offering excellent resistance to weathering and a warm, classic look. Understanding the specific characteristics of the 400 Series is the first step towards a successful installation.
These windows are available in a variety of styles, including casement, awning, double-hung, and picture windows, each requiring slightly different installation techniques. Casement windows, in particular, feature an opening control device – a critical component for managing ventilation and preventing over-extension. Proper installation ensures airtightness, energy efficiency, and smooth operation.
Before beginning, familiarize yourself with the window’s components, including the frame, sash, and operating hardware. Resources like Garrett Kirk’s blog and Andersen’s official parts website (parts.andersenwindows.com) provide valuable insights. A thorough understanding of these elements will streamline the installation process and minimize potential issues. Careful planning and adherence to Andersen’s guidelines are essential for maximizing the lifespan and performance of your new windows.
Tools and Materials Required for Installation
Successful Andersen 400 Series window installation demands a comprehensive collection of tools and materials. Essential tools include a level (both 4-foot and torpedo), measuring tape, caulk gun, utility knife, drill with various bits, and a screwdriver set. A hammer, shims, and flashing tape are also crucial for a secure and weatherproof installation.
Beyond hand tools, consider power tools like a circular saw for precise rough opening adjustments and a nail gun for efficient fastening. Safety gear, including safety glasses and gloves, is paramount. Materials needed encompass exterior-grade caulk, low-expansion spray foam insulation, and appropriate fasteners – typically screws designed for window installation.
Flashing materials, compatible with your siding type, are vital for preventing water intrusion. Don’t forget shims of varying thicknesses to ensure the window frame is perfectly plumb and level. Finally, have a supply of wood shims for interior finishing. Referencing Andersen’s installation guides will confirm specific fastener requirements and recommended sealant types for optimal performance and warranty compliance. Proper preparation with the correct tools and materials sets the stage for a professional result.
Preparing the Rough Opening
Properly preparing the rough opening is fundamental to a successful Andersen 400 Series window installation. Begin by carefully measuring the opening’s width and height, ensuring it aligns precisely with the window’s dimensions. Any discrepancies must be addressed before proceeding.
Inspect the framing for squareness and plumb. Correct any deviations using wood shims or, if necessary, adjustments to the framing itself. The sill must be level and structurally sound to support the window’s weight. Remove any debris, old nails, or obstructions from the opening.
Apply flashing tape to the sill of the rough opening, extending it up the sides, creating a water-resistant barrier. This is a critical step in preventing moisture damage. Ensure the opening is adequately sized to accommodate the window and allow for proper insulation and sealant application. A slightly oversized opening can be adjusted with shims, but a too-small opening requires more extensive modification. Prioritize a clean, square, and level rough opening for a seamless and durable installation.
Installing the Window Frame
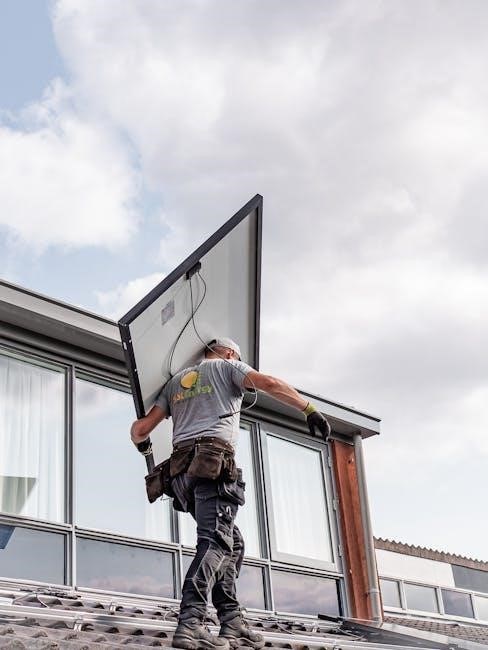
Carefully lift the Andersen 400 Series window frame into the prepared rough opening. Center the frame within the opening, ensuring equal spacing on all sides. Begin by gently setting the frame onto the sill, verifying it rests securely on the flashing tape previously applied.

Initial placement is crucial; avoid forcing the frame into the opening. Use temporary bracing to hold the frame plumb and square while you begin the fastening process. Check the frame’s alignment with a level and square, making adjustments as needed before securing it permanently.

Start with the sill, applying a bead of sealant between the window frame and the sill of the rough opening. Then, proceed to the sides and head, maintaining consistent sealant application. Ensure the frame is snug against the rough opening but not overly compressed, allowing for proper operation and thermal expansion. Proper alignment and sealant application are vital for weather resistance and energy efficiency.

Ensuring Proper Shimming and Leveling
Shimming is critical for a square and functional Andersen 400 Series window installation. Begin by inserting shims between the window frame and the rough opening at multiple points – corners, sides, and top. Use composite shims, as they are less prone to rot than wood;
Focus on achieving a perfectly plumb and level installation. Use a level to check both vertical and horizontal alignment. Adjust the shims incrementally until the frame is consistently level and plumb. Avoid over-tightening shims, which can distort the frame.

Pay close attention to the corners, ensuring they are square. A slightly out-of-square frame can lead to operational issues. Once the frame is level, plumb, and square, secure the shims in place with screws or adhesive. Regularly re-check alignment throughout the shimming process. Proper shimming ensures smooth operation and prevents future stress on the window components.
Fastening the Window Frame to the Rough Opening
Securing the Andersen 400 Series window frame to the rough opening requires appropriate fasteners and careful placement. Use screws specifically designed for window installation; avoid nails, as they lack the necessary holding power. Predrill pilot holes through the window frame and into the framing studs to prevent splitting.
Fastener spacing is crucial. Typically, screws should be placed every 16-24 inches along the frame sides and top. Pay particular attention to corners, ensuring they are securely fastened. Drive the screws straight and avoid over-tightening, which can distort the frame or strip the screw holes.

Ensure the fasteners penetrate sufficiently into the framing studs – a minimum of 1.5 inches is recommended. Check local building codes for specific fastener requirements. After fastening, re-verify the window’s level and plumb. Any adjustments should be made before completing the fastening process. A properly fastened frame provides structural integrity and prevents air and water infiltration.
Installing the Window Sash
Carefully lift the window sash into the installed frame. Ensure the sash is aligned with the frame opening, avoiding any forceful maneuvers that could damage the window or frame. Depending on the window style (casement, awning, etc.), the installation process will vary slightly.
For casement windows, typically the sash hinges are pre-installed. Align the hinges with the corresponding mounting points on the frame. Secure the hinges using the provided screws, ensuring they are snug but not over-tightened. Check the sash’s operation at each hinge point to confirm smooth movement.
For other window styles, follow the manufacturer’s specific instructions for sash installation. Once the sash is in place, inspect the weatherstripping to ensure a proper seal. Any gaps or misalignments should be addressed before proceeding. A correctly installed sash is vital for energy efficiency, weather protection, and smooth operation.
Adjusting the Window Sash for Smooth Operation
After installing the sash, meticulous adjustment is key for effortless operation. Begin by checking the sash’s movement – it should open and close smoothly without binding or resistance. Andersen 400 Series windows often feature adjustable hardware, allowing for fine-tuning.
Casement windows, in particular, require attention to the operator and hinges. The operator mechanism controls the ease of opening and closing; adjustments can be made to the linkage to improve functionality. Inspect the hinges for proper alignment; loose or misaligned hinges can cause binding. Tighten or adjust as needed, ensuring the sash remains square within the frame.
For windows with locking mechanisms, verify that the locks engage smoothly and securely. If the sash rubs against the frame, slight adjustments to the strike plate or weatherstripping may be necessary. Regularly lubricating moving parts with a silicone-based lubricant will further enhance smooth operation and prolong the window’s lifespan.
Understanding the Opening Control Device
The opening control device, commonly found on Andersen 400 Series casement windows, regulates how far the window opens. This feature prevents excessive opening, protecting the window and surrounding areas from damage during strong winds or accidental impacts. It’s a crucial safety and operational component.
These devices typically consist of a sliding mechanism or a tension adjustment that limits the outward swing of the sash. Understanding its function is vital during installation and troubleshooting. Incorrectly installed or adjusted devices can hinder smooth operation or compromise the window’s safety features.
Different models may have varying adjustment methods. Some utilize a simple slider, while others require turning a screw to increase or decrease the opening limit. Referencing Andersen’s documentation or online resources, like those found on Garrett Kirk’s blog, is highly recommended. Proper understanding ensures the device functions as intended, providing controlled ventilation and preventing potential damage to the window or surrounding structures.
Installing the Opening Control Device on Casement Windows
When installing the opening control device on Andersen 400 Series casement windows, begin by identifying the correct orientation – typically located on the window’s hinge side. Ensure the device slides smoothly into its designated slot within the window frame. Refer to resources like YouTube tutorials (search “Andersen Window Control Device”) for visual guidance.
Once inserted, adjust the device to the desired opening limit. This often involves sliding a component or turning a screw. Test the operation frequently during adjustment. The goal is to allow sufficient ventilation while preventing the window from overextending. Avoid forcing the mechanism; smooth operation indicates correct installation.

Confirm the device securely locks into place, preventing accidental disengagement. A properly installed device will restrict the outward swing, offering a noticeable resistance when attempting to open the window beyond the set limit. Double-check the functionality after installation, ensuring it aligns with Andersen’s specifications and provides the intended safety and operational benefits. Resources like parts.andersenwindows.com can help identify the correct part.
Troubleshooting Common Installation Issues
Common issues during Andersen 400 Series window installation often involve improper alignment or sticking sashes. First, verify the rough opening dimensions are accurate and square. If the window doesn’t fit snugly, re-examine the opening for obstructions or inconsistencies. Shimming is crucial; insufficient or uneven shimming can cause operational problems.
Sticking sashes frequently indicate binding points. Inspect the frame and sash corners for obstructions or paint buildup. Ensure the window operator is correctly engaged and functioning smoothly. If the operator feels stiff, lubrication may be necessary. Refer to Andersen’s documentation for recommended lubricants.
Another frequent problem is difficulty with the opening control device. If it’s not engaging or restricting the window’s swing, double-check its installation and alignment. Online resources, including YouTube videos demonstrating Andersen window control device installation, can be invaluable. Finally, always verify that all fasteners are secure, but not over-tightened, to avoid warping the frame.
Addressing Window Operator Problems (400 Series)
Andersen 400 Series window operators, particularly on casement windows, can experience issues like stiff movement or failure to fully open or close. A common cause is a lack of lubrication. Apply a silicone-based lubricant to the operator’s moving parts, avoiding oil-based products that attract dust. Inspect the operator arm for bends or damage, as these can impede function.
If the operator handle feels loose or stripped, it may require replacement. Andersen offers replacement parts readily available through their website and authorized dealers. When replacing, ensure the new operator is the correct model for your window size and style. Difficulty engaging the operator often stems from misalignment; verify the operator arm connects properly to both the sash and the frame.
Resources like Mungfali.com showcase hard-to-find parts and offer insights into operator repair. YouTube tutorials provide visual guidance for disassembly and reassembly. If problems persist, consult a qualified window technician, as internal operator components may require professional attention.
Weatherproofing and Insulation Techniques

Effective weatherproofing is critical during Andersen 400 Series window installation to prevent drafts, moisture intrusion, and energy loss. Proper flashing around the window opening is paramount. This involves layering flashing materials – typically a self-adhering membrane – to create a watertight seal between the window frame and the rough opening. Ensure the flashing extends beyond the window frame on all sides.
High-quality exterior-grade caulk should be applied around the perimeter of the window frame where it meets the siding. Pay close attention to gaps and seams. For optimal insulation, consider using expanding foam sealant in larger gaps before caulking. This fills voids and minimizes air infiltration.
Inspect the window’s weep holes to ensure they are unobstructed, allowing any accumulated moisture to drain properly. Interior insulation can be enhanced with low-expansion spray foam around the frame, but avoid overfilling, which could distort the window. A properly sealed and insulated window significantly improves energy efficiency and comfort.
Flashing Around the Window
Proper flashing is the cornerstone of a weather-tight Andersen 400 Series window installation. Begin by applying a self-adhering flashing tape to the sill of the rough opening, extending up the sides at least 4-6 inches. This creates a primary barrier against water intrusion.
Next, apply flashing to the sides of the opening, overlapping the sill flashing. Ensure the flashing is tightly adhered to the framing, creating a continuous, seamless layer. At the top of the opening, install a header flashing, again overlapping the side flashing. This directs water away from the window.
Crucially, the flashing must integrate with the weather-resistant barrier (WRB) on the exterior of the wall. Overlap the WRB over the flashing, ensuring a shingle-like effect, so water flows downwards and outwards. Inspect all seams and corners for gaps, sealing them with flashing tape.
Remember to choose a flashing material compatible with both the window frame and the WRB. A correctly installed flashing system prevents water damage and maintains the integrity of the wall assembly.
Interior Finishing and Trim Installation
Once the Andersen 400 Series window is secured and weatherproofed, interior finishing begins. Start by insulating around the window frame with low-expansion spray foam, filling any gaps between the frame and the rough opening. Be cautious not to overfill, as this can distort the frame.
After the foam has cured, carefully trim away any excess. Install interior trim – jambs, casings, and sills – using finishing nails. Ensure the trim is level, plumb, and square. Consider using a miter saw for precise cuts and a nail set to countersink the nails.
Caulk all gaps between the trim and the window frame, as well as the trim and the wall. Use a paintable caulk that is compatible with both the window material and the wall finish. Smooth the caulk bead with a wet finger or a caulking tool for a professional look.

Finally, prime and paint or stain the trim to match the surrounding décor. Protect the window glass with painter’s tape during the finishing process. A well-finished interior enhances the window’s appearance and provides a seamless integration with the room;
Andersen 400 Series Window Component Parts
Understanding the components of your Andersen 400 Series window is vital for a successful installation and future maintenance. Key parts include the window sash, which is the operable portion containing the glass. The frame, typically made of wood clad with aluminum or vinyl, provides structural support.
The window operator, crucial for casement and awning windows, controls opening and closing. This often includes a crank mechanism and associated hardware. Weatherstripping creates a tight seal against air and water infiltration, while glazing holds the glass in place.
Look for the opening control device, a feature on casement windows limiting the extent of opening. Jambs are the vertical sides of the frame, and sills form the bottom. Grilles, if present, are decorative dividers within the glass;
Andersen’s website (parts.andersenwindows.com) provides detailed diagrams and part numbers. Familiarizing yourself with these components before starting allows for easier identification during installation and simplifies any future repairs or replacements. Proper component knowledge ensures a lasting, functional window.