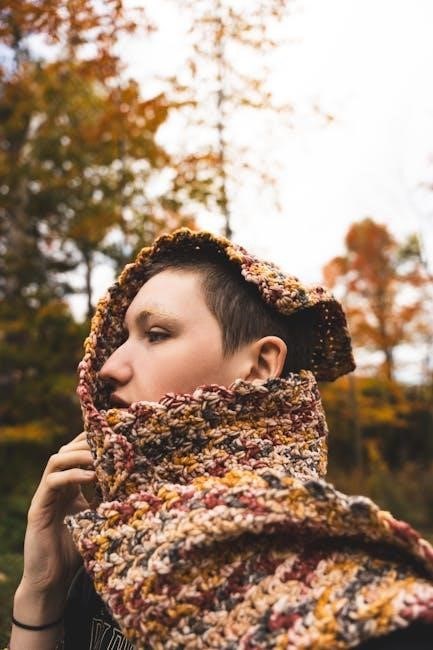
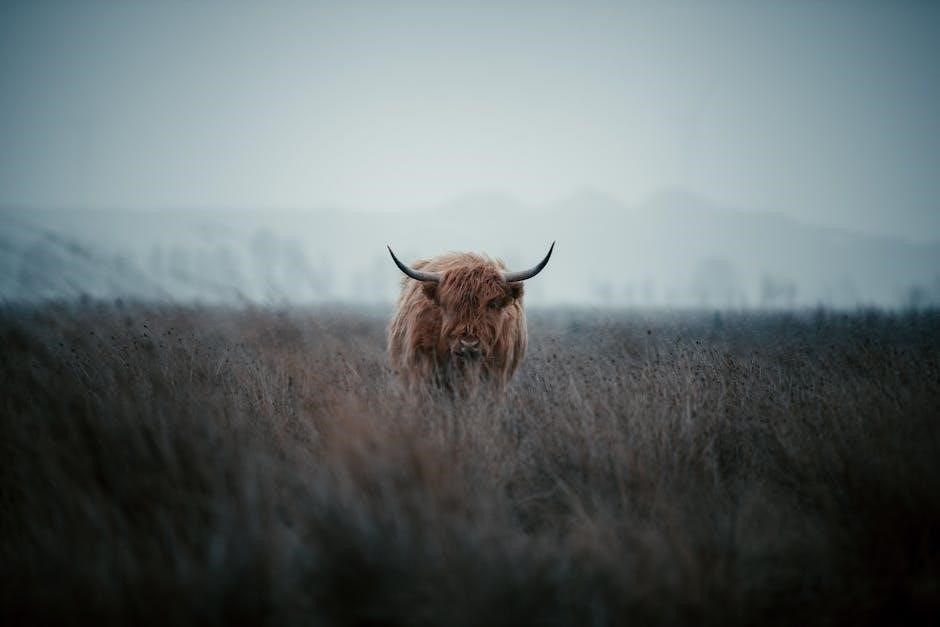
Discover the charm of creating a Highland Cow amigurumi with free PDF patterns! These detailed guides offer step-by-step instructions for crafting adorable‚ shaggy-haired cows‚ perfect for all skill levels.
What is a Highland Cow Crochet Pattern?
A Highland Cow Crochet Pattern is a detailed guide for creating adorable amigurumi cows. These patterns include step-by-step instructions‚ materials lists‚ and tips for crafting realistic features like shaggy hair‚ horns‚ and expressive eyes. Available as free PDF downloads‚ they cater to all skill levels‚ offering a fun and customizable project. Whether you’re a beginner or an experienced crafter‚ these patterns help you bring the charm of Scotland’s iconic Highland Cows to life with yarn‚ making them perfect for gifts‚ home decor‚ or personal enjoyment. The patterns often include photos and tutorials for a seamless crafting experience.
Why Choose a Free PDF Pattern?
Free PDF patterns for Highland Cow crochet projects offer unmatched convenience and accessibility. They provide detailed‚ ad-free instructions‚ making them ideal for crafters of all skill levels. Printable and portable‚ these patterns are perfect for on-the-go creativity. Many include photo tutorials and step-by-step guides‚ ensuring clarity and ease of use. By choosing a free PDF‚ you can customize your Highland Cow with different yarn colors or embroidered details‚ allowing you to personalize your project. This cost-effective option makes it easy to start crafting immediately‚ providing hours of creative fun and a charming finished product to cherish or gift.
Materials and Tools Needed
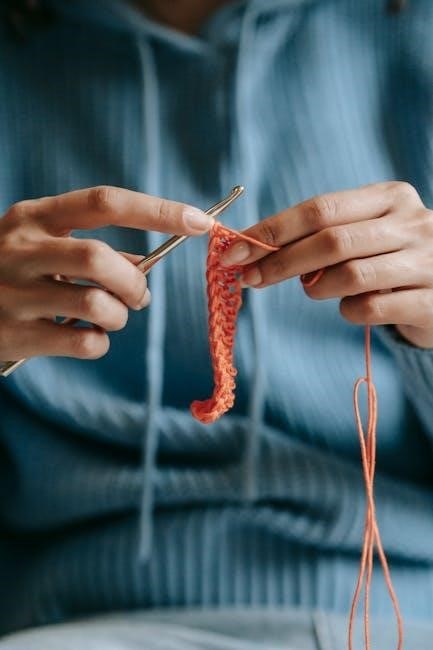
To begin your Highland Cow crochet project‚ you’ll need specific materials. Worsted weight yarn in earthy tones is ideal for capturing the cow’s natural appearance. A 4.0mm crochet hook is recommended for the right stitch size. Stuffing materials like polyfill will bring your cow to life‚ while a tapestry needle is essential for weaving ends. Scissors‚ stitch markers‚ and embroidery floss for details like eyes and horns are also necessary. Ensure you have these supplies ready to craft a charming and realistic Highland Cow amigurumi that reflects the beauty of these iconic animals with precision and care.
Materials Needed for the Highland Cow Crochet Project
Gather bulky yarn in dark and light shades‚ a 4mm crochet hook‚ stuffing material‚ scissors‚ and a tapestry needle. Stitch markers and embroidery floss are also essential for details.
Yarn Selection
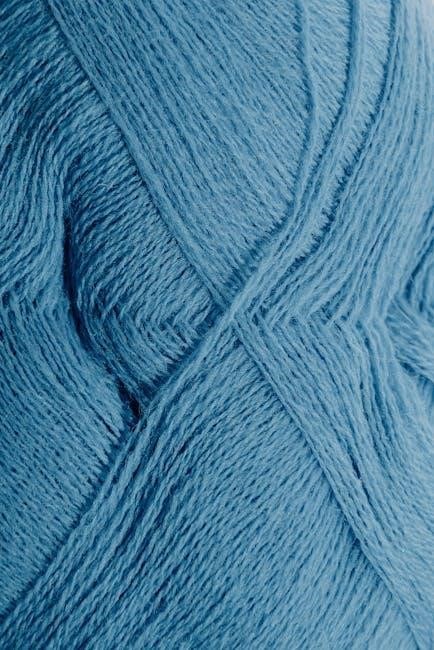
Choosing the right yarn is crucial for your Highland Cow crochet project. Opt for bulky or worsted weight yarn in earthy tones like brown‚ beige‚ and cream to capture the cow’s natural appearance. Dark shades are ideal for the body‚ while lighter hues work well for the muzzle and horns. Consider using soft‚ durable yarns like acrylic or blends for a cuddly finish. Some patterns recommend specific brands‚ such as Premier Basix Chenille‚ for a cozy texture. Experiment with pastel colors for a whimsical look or stick to traditional shades for an authentic Highland Cow design. Yarn choice greatly impacts the final result‚ so select wisely for the desired effect.
Crochet Hook Size
Selecting the right crochet hook size is essential for achieving the correct tension and texture in your Highland Cow project. A 4mm (G6) hook is commonly recommended for most patterns‚ ensuring a snug and even stitch that holds the stuffing well. Proper tension prevents the fabric from being too loose or too tight‚ which is crucial for amigurumi toys. Using the suggested hook size ensures your cow’s features‚ like the head‚ ears‚ and legs‚ are proportionate and well-defined. Always check your gauge to maintain consistency‚ and adjust the hook size if needed to achieve the desired texture for your Highland Cow crochet project.
Stuffing Materials
Polyfil is the most commonly recommended stuffing material for Highland Cow crochet projects‚ as it provides a soft‚ cuddly texture and holds its shape well. For added stability‚ especially in the neck area‚ some patterns suggest using a neck strengthener. This small piece of fabric or interfacing helps maintain the cow’s posture and prevents the head from flopping. When stuffing‚ fill the body firmly but not overly so‚ ensuring a plush appearance. Use a handful at a time‚ gently shaping as you go to achieve an even distribution. Proper stuffing ensures your Highland Cow amigurumi is both adorable and durable.
Additional Supplies (Scissors‚ Tapestry Needle‚ etc.)
Besides yarn and hooks‚ essential tools for your Highland Cow crochet project include sharp scissors for cutting yarn‚ a tapestry needle for weaving in ends‚ and a stitch marker to track your place. Optional supplies like embroidery floss or black thread can add details like eyes or nostrils. A yarn needle is handy for sewing parts together‚ while fabric glue can secure small elements. Having these tools ready ensures a smooth and enjoyable crafting experience‚ allowing you to focus on bringing your Highland Cow amigurumi to life with precision and creativity.
Step-by-Step Instructions for the Highland Cow Crochet Pattern
This guide provides a detailed‚ easy-to-follow roadmap for crafting your Highland Cow amigurumi. From the head and muzzle to the ears‚ horns‚ body‚ legs‚ tail‚ and shaggy hair‚ every step is covered with clarity and precision‚ ensuring a successful and enjoyable project for all skill levels.
Crocheting the Head and Muzzle
Start by creating a magic ring and crocheting the head using worsted weight yarn and a 4.0mm hook. Work in rounds‚ increasing stitches to form the head shape. For the muzzle‚ use a smaller hook or fewer stitches to achieve a rounded‚ compact shape. Stuff the head firmly with polyfill and shape it as you go. Embroider the eyes and nose using black yarn for a realistic look. Ensure the muzzle is securely attached to the head‚ aligning the stitches properly. This step sets the foundation for your Highland Cow’s charming appearance‚ so take your time to shape it neatly.
Creating the Ears and Horns
Stitching the Body and Legs
Start by crocheting the body in rounds using bulky yarn‚ ensuring a sturdy structure. Use a 4mm hook and follow the pattern’s stitch count closely. Stuff the body firmly with polyfill as you go to maintain shape. For the legs‚ crochet small cylinders‚ leaving a small opening for stuffing. Attach the legs evenly around the base of the body‚ securing them tightly. Use a stitch marker to keep track of the first stitch in each round. Ensure the legs are evenly spaced for balance. Once attached‚ weave in ends with a tapestry needle for a clean finish. Proper stuffing and even spacing ensure your Highland Cow stands steadily and looks charming.
Adding the Tail
Crochet the tail using bulky yarn and a 4mm hook‚ working in a few rounds to create a small‚ rounded shape. Stuff the tail lightly with polyfill to maintain its form without making it too bulky. Attach the tail to the back of the body‚ positioning it slightly above the legs for a natural look. Use a tapestry needle to sew it securely‚ ensuring the stitches are tight to prevent the tail from sagging. This final touch adds a charming‚ lifelike detail to your Highland Cow‚ completing its rustic and adorable appearance.
Working on the Shaggy Hair
Crochet the shaggy hair by creating long strands of yarn or using specialized crochet fur. Attach these strands to the head and body using a tapestry needle‚ spacing them evenly for a natural look. Start by sewing the longest strands around the head and shoulders‚ then fill in gaps with shorter pieces. Use a mix of light and dark shades to mimic the Highland Cow’s distinctive coat. For a more realistic effect‚ gently brush the yarn with a soft comb to blend the strands. This step adds texture and character‚ giving your cow its iconic shaggy appearance.
Attaching All Parts Together
Once all components are crocheted‚ use a tapestry needle to sew them together. Start by attaching the head to the body‚ ensuring proper alignment. Next‚ secure the ears and horns to the top of the head‚ spacing them evenly. Attach the legs to the underside of the body‚ making sure they are evenly spaced for stability. Finally‚ sew the tail to the back of the body. Use a whipstitch or slip stitch to join the parts‚ tightening the stitches as you go for a seamless finish. Double-check each attachment to ensure it is secure and evenly aligned for a polished look.
Customization Tips for Your Highland Cow
Personalize your Highland Cow with unique touches! Use different yarn colors for a vibrant look‚ add embroidered details like eyes or a smile‚ or accessorize with a tiny scarf or flower crown.
Choosing Different Yarn Colors
Customize your Highland Cow by experimenting with yarn colors! Opt for earthy tones like brown and cream for a traditional look‚ or pastel shades for a whimsical twist. Use contrasting colors for horns‚ noses‚ and hair to add personality. Lighter hues can highlight facial features‚ while darker tones create depth. Consider seasonal themes‚ like red for a festive touch or bright colors for a playful vibe. A color wheel can help you select harmonious shades. Don’t forget small details—white for eyes or black for nostrils can make your cow stand out. Let your creativity shine with unique color combinations!
Adding Embroidered Details
Add personality to your Highland Cow with embroidered details! Use embroidery floss to create expressive eyes‚ eyebrows‚ and a charming nose. Stitch horns with a contrasting color for a striking look. For a whimsical touch‚ embroider a smile or add texture to the muzzle. Consider adding subtle shading to the ears or face for depth. A tapestry needle works best for these details. Use a backstitch for outlines and French knots for small features like nostrils. These embellishments bring your cow to life‚ making it uniquely yours. Experiment with patterns or keep it simple—embroidery adds that extra special charm!
Accessorizing Your Cow
Elevate your Highland Cow crochet project by adding charming accessories! A tiny flower crown or scarf can give your cow a whimsical touch. Try a bell collar for a rustic feel or a bow for a festive look. Use leftover yarn to create a matching hat or bandana. For a personalized twist‚ add a name tag or a tiny charm. Accessories allow you to express your creativity and make your cow truly unique. Whether it’s a seasonal theme or a playful detail‚ these small additions bring personality to your finished piece and make it stand out. Get creative and enjoy the process of making your cow one-of-a-kind!
Tips and Tricks for Beginners
Master the basics of crochet abbreviations and practice with scrap yarn. Use stitch markers to keep track of rounds and patterns. Don’t hesitate to ask for help online or in crochet communities for troubleshooting. Start with a simple project and gradually build your skills. Watching tutorials can also help clarify complex steps.
Understanding Crochet Abbreviations
Mastering crochet abbreviations is essential for following patterns smoothly. Common terms like “ch” (chain)‚ “sc” (single crochet)‚ and “st” (stitch) are frequently used. Always refer to the glossary provided in your pattern for clarity. Beginners should practice basic stitches before diving into complex designs. If unsure‚ tutorials or crochet communities online can help. Pay attention to stitch markers to keep track of your progress. Familiarizing yourself with these terms will ensure your Highland Cow project turns out perfectly. With practice‚ these abbreviations will become second nature‚ making your crocheting journey more enjoyable and efficient.
Managing Stitch Markers
Stitch markers are invaluable tools for tracking your place in a pattern. Use them to mark increases‚ decreases‚ or the start of a round. Place markers on specific stitches to avoid losing count. For the Highland Cow pattern‚ markers are especially useful when shaping the head‚ muzzle‚ and ears. Choose small‚ easy-to-handle markers that won’t damage the yarn. If you misplace one‚ count your stitches carefully to ensure accuracy. Consider using different colored markers for different purposes‚ like distinguishing between body and leg sections. This simple trick will keep your project organized and stress-free‚ ensuring your cow turns out perfectly shaped and aligned.
Troubleshooting Common Mistakes
When crocheting your Highland Cow‚ common mistakes include uneven stitches or misshapen parts. If your stitches are uneven‚ re-count your stitches carefully to ensure accuracy. If a section appears misshapen‚ check for missed increases or decreases. Use a tapestry needle to weave in ends neatly to avoid bulk. For fluffy yarn‚ gently tease out fibers to achieve the desired texture. Don’t panic if small errors occur—most can be fixed by frogging (ripping out) and reworking the section. Remember‚ patience and attention to detail will result in a perfectly charming Highland Cow. Always review your pattern before troubleshooting to ensure you’re on track.

Assembly and Finishing Touches
Use a tapestry needle to sew all crocheted parts together neatly. Stuff the body firmly with polyfil for shape. Attach ears‚ horns‚ and tail securely. Use scissors to trim excess yarn and ensure a polished finish. Finally‚ attach fur strands around the head and horns for the Highland Cow’s signature shaggy appearance.
Stuffing the Body Properly
Stuffing the Body Properly
Stuff the Highland Cow’s body firmly with polyfil to create a sturdy shape. Use a handful of stuffing at a time‚ ensuring the body feels solid but not overly rigid. Avoid overstuffing‚ as this can make the cow too bulky. Gently press the stuffing into corners and edges to maintain the desired form. Use a stuffing tool or chopstick to distribute the filling evenly. Proper stuffing ensures the cow sits upright and maintains its charm. Once stuffed‚ close the opening securely with a needle and yarn to keep the filling in place.
Securing Loose Ends
Securing Loose Ends
After completing the Highland Cow crochet project‚ carefully weave in all loose yarn ends using a tapestry needle. This step ensures a neat‚ polished finish. Insert the needle into nearby stitches‚ moving the yarn tail in a consistent direction to prevent visibility. For added security‚ tie a small knot before trimming excess yarn; This method keeps the cow’s seams intact and prevents fraying. Properly securing loose ends is crucial for the durability and appearance of your finished Highland Cow amigurumi‚ ensuring it remains charming and well-crafted for years to come.
Storing and Caring for Your Finished Highland Cow
Store your Highland Cow in a dry‚ clean environment to preserve its quality. Lightly spot clean with a damp cloth for minor stains to maintain its appearance and longevity.
Storage Tips
To keep your Highland Cow crochet project looking its best‚ store it in a dry‚ clean environment away from direct sunlight. Avoid damp areas to prevent moisture damage. Use an airtight container or fabric bag to protect it from dust. If storing for an extended period‚ add a small packet of silica gel to absorb moisture. For added protection‚ you can lightly stuff the body with polyester fiberfill before storing. This will help maintain its shape and ensure your Highland Cow remains pristine for years to come.
Cleaning and Maintenance
To maintain your Highland Cow crochet project‚ gently spot clean stains with a damp cloth and mild detergent. Avoid machine washing or soaking‚ as this may distort the shape or damage the yarn. For tougher stains‚ lightly hand wash with cold water and a soft detergent‚ then air dry away from direct sunlight. Avoid exposure to harsh chemicals or heat‚ as this can harm the materials. Regularly brushing the shaggy hair with a soft comb can keep it looking fresh. Store in a clean‚ dry place to preserve its quality and appearance over time.
Sharing Your Finished Highland Cow Project
Showcase your Highland Cow crochet creation by sharing photos on social media platforms like Instagram or Facebook. Many crafters enjoy displaying their work at local craft fairs‚ gaining admiration and inspiration from others. Sharing your finished project not only highlights your creativity but also connects you with a community of crochet enthusiasts who appreciate handmade art. It’s a great way to inspire others and celebrate your crafting journey!
Posting on Social Media
Sharing your Highland Cow crochet project on social media is a great way to connect with fellow crafters and showcase your creativity. Platforms like Instagram and Facebook are perfect for posting high-quality photos of your finished cow. Use hashtags like #HighlandCowCrochet or #AmigurumiLove to reach a wider audience. Many crafters also tag crochet communities or pattern designers for feedback and inspiration. Consider adding a brief description of your process‚ the yarn you used‚ or any customization you incorporated. Sharing your work can inspire others and help you gain appreciation for your handmade creation. It’s also a wonderful way to join a supportive crafting community!
Displaying at Craft Fairs
Displaying your Highland Cow crochet project at craft fairs is a fantastic way to showcase your talent and connect with potential buyers. Arrange your cow in an attractive setup‚ using props like rustic backdrops or farm-themed accessories to highlight its charm. Ensure good lighting to emphasize the details‚ such as the shaggy hair or embroidered features. Consider adding a sign with your social media handles or pattern details to attract interest. Engage with visitors by sharing the story behind your creation and how you customized it. Craft fairs are also a great opportunity to receive feedback and generate demand for custom orders or similar projects.
Creating a Highland Cow with a free PDF pattern is a delightful project. It offers a creative way to craft a charming‚ customizable amigurumi toy.
Final Thoughts on the Highland Cow Crochet Pattern
Crocheting a Highland Cow is a fun and rewarding project‚ offering a chance to create a unique‚ shaggy-haired amigurumi toy. With free PDF patterns‚ crafters of all skill levels can follow detailed guides to bring this charming Scottish icon to life. The pattern’s versatility allows for customization‚ from earthy tones to whimsical designs. Whether for personal enjoyment or as a thoughtful gift‚ this project promises hours of creative joy and a delightful finished piece to treasure or share.
Encouragement to Start Your Project
Embark on the delightful journey of crocheting a Highland Cow! With a free PDF pattern‚ you’ll have clear guidance to create this charming amigurumi toy. Whether you’re a seasoned crafter or a beginner‚ this project is designed to be fun and rewarding. Choose your favorite yarn colors‚ add personalized details‚ and watch your cow come to life. The sense of accomplishment you’ll feel when finishing your project is truly satisfying. Don’t hesitate—grab your hook‚ yarn‚ and pattern‚ and start crafting your own unique Highland Cow today!
Additional Resources
Explore recommended crochet books‚ join online crochet communities‚ and find supplies and yarn recommendations to enhance your Highland Cow project. These resources offer inspiration and support for all skill levels.
Recommended Crochet Books
Enhance your crocheting journey with books like “The Complete Book of Crochet” and “Amigurumi Toys”‚ which offer detailed techniques and patterns for creating adorable Highland Cows. These resources provide step-by-step guides‚ stitch tutorials‚ and inspiration for customizing your project. Whether you’re a beginner or an experienced crafter‚ these books will help you master the art of amigurumi and bring your Highland Cow to life with precision and creativity. They are perfect companions for your free PDF pattern‚ ensuring your project turns out charming and unique.
Online Crochet Communities
Join vibrant online crochet communities to connect with fellow crafters and share your Highland Cow projects. Platforms like Facebook groups‚ Instagram‚ and Ravelry offer forums‚ galleries‚ and shared tips. These spaces are perfect for showcasing your finished cow‚ learning from others‚ and discovering inspiration. Many communities host challenges‚ Q&A sessions‚ and live streams to help troubleshoot patterns. They also provide opportunities to exchange ideas‚ such as yarn color suggestions or customization tips. Engaging with these groups can enhance your crocheting experience and help you refine your Highland Cow amigurumi creation.
Supplies and Yarn Recommendations
For a Highland Cow crochet project‚ choose bulky yarn for the body in earthy tones‚ with lighter shades for the nose and horns. A 4mm (G/6) or 5mm (H/8) crochet hook is ideal. Use polyester fiberfill for stuffing to ensure a soft‚ cuddly texture. Essential tools include scissors‚ a tapestry needle‚ and stitch markers. Opt for worsted weight yarn for a more detailed look or bulky yarn for a quicker‚ chunkier finish. Consider using yarn with good stitch definition to highlight the cow’s shaggy texture. These supplies ensure your Highland Cow amigurumi turns out adorable and durable‚ perfect for gifts or home decor.